
【Rails】ViewComponentを使って再利用可能なコンポーネントを作成する

今回は再利用可能なUIコンポーネントを作成するためのフレームワークであるViewComponentを使ってみます。
公式ドキュメント
https://viewcomponent.org/
GitHub
https://github.com/viewcomponent/view_component
ViewComponentとは
公式によるとReactから影響を受けたpresenter patternという手法を進化させたようなものだそうです。
ViewComponents are Ruby objects used to build markup. Think of them as an evolution of the presenter pattern, inspired by React.
インストール
今回は以下のバージョンで動作確認を行なっています。
$ rails -v
Rails 8.0.1

$ ruby -v
ruby 3.3.4
rails new実行時のオプションとしては以下を指定しています。
JavaScriptのビルドにESBuildを使用cssフレームワークのTailwind CSSを使用
gemfileにview_componentを追加します。
gem "view_component"インストールします。
$ bundle installgenerator実行
インストール後、コンポーネント名とコンポーネントで使用する引数を指定してファイルを生成するgenerateコマンドが使えるようになります。
$ rails generate component コンポーネント名 引数1 引数2見出しコンポーネントを作成してみます。
$ rails generate component Heading size textcomponentsディレクトリ、その配下に2つのファイルが作成されました。
# frozen_string_literal: true

class HeadingComponent < ViewComponent::Base
  def initialize(size:, text:)
    @size = size
    @text = text
  end
end
<div>Add Heading template here</div>コンポーネント名_component.rbファイルで引数を受け取って初期化や、ロジックを記述、コンポーネント名_component.html.erbファイルでレンダリングを行います。
基本的な使い方
実際に使ってみます。
表示確認
まずは表示確認用のページを準備します。
コントローラー、viewファイル作成
$ rails g controller home index ルーティング追加
Rails.application.routes.draw do
  # 省略

  root "home#index" # 追加
end
ルートページに以下のように記述します。
今回size, textという引数を指定したので、一旦適当に値を入れておきます。
<%= render(HeadingComponent.new(size: "h1", text: "見出し1")) %>ルートページにアクセスするとheading_component.html.erbの内容が表示されます。

インスタンス変数を表示
heading_component.html.erbではheading_component.rbで初期化時に定義されたインスタンス変数を利用できます。
heading_component.html.erbを次のように修正します。
<div><%= @text %></div>ルートページにアクセスすると先ほどtext引数に指定した文字が表示されています。
ロジックを追加
componentsディレクトリ配下にもTailwindCSSのスタイルを適応できるようにtailwind.config.jsにパスを追加します。
module.exports = {
  content: [
    './app/views/**/*.html.erb',
    './app/components/**', // 追加
    './app/helpers/**/*.rb',
    './app/assets/stylesheets/**/*.css',
    './app/javascript/**/*.js'
  ]
}heading_component.rbにsize引数の値に応じたTailwindCSSのクラスを返すメソッドを追加します。
# frozen_string_literal: true

class HeadingComponent < ViewComponent::Base
  def initialize(size:, text:)
    @size = size
    @text = text
  end

  # 追加
  def font_size
    case @size
    when "h1"
      "text-2xl"
    when "h2"
      "text-xl"
    when "h3"
      "text-lg"
    else
      "text-md"
    end
  end
endheading_component.html.erbでクラスを適応するように修正します。
<div class="<%= class_names("font-bold", font_size) %>"><%= @text %></div>ルートページに4パターン表示してみます。
<%= render(HeadingComponent.new(size: "h1", text: "見出し1")) %>
<%= render(HeadingComponent.new(size: "h2", text: "見出し2")) %>
<%= render(HeadingComponent.new(size: "h3", text: "見出し3")) %>
<%= render(HeadingComponent.new(size: "h4", text: "見出し4")) %>ルートページにアクセスするとsize引数によってスタイルを変えることができているのが確認できます。

現状全てdivタグでレンダリングされているのでsize引数で渡した値のタグを生成するように変更します。
<%= content_tag(@size.to_sym, @text, class: class_names("font-bold", font_size)) %>再度ルートページにアクセスするとsize引数に渡した値でタグが生成されていることが確認できます。

その他機能
コレクション
partialを繰り返し表示する際によく使うcollectionの指定をViewComponentでも同様に行うことができます。
まずはpartialで実装してみます。
何かしらデータがあった方が良いので適当にCategoryモデルを作成します。
モデル、テーブル作成
$ rails g model Category name
$ rails db:migrate
コントローラー、viewファイル作成
$ rails g controller categories indexルーティング追加
Rails.application.routes.draw do
  # 省略
  resources :categories, only: :index # 追加
  root "home#index"
end
コントローラのindexアクションで全てのカテゴリを取得します。
class CategoriesController < ApplicationController
  def index
    @categories = Category.order(created_at: :desc)
  end
endapp/views/categories配下に_category.html.erbを以下の内容で作成します。
<%= category.name %><br/>作成したpartialをcollectionを使って表示します。
せっかくなので先ほど作成した見出しコンポーネントも使ってあげます。
<%= render(HeadingComponent.new(size: "h1", text: "カテゴリ一覧")) %>
<br/>

<%= render(HeadingComponent.new(size: "h2", text: "パーシャルを使った表示")) %>
<%= render partial: "category", collection: @categories %>ちなみに今回の場合は<%= render @categories %>のように省略しても書けます。
rails consoleでデータをいくつか入れます
$ rails c
> Category.create(name: "経済")
> Category.create(name: "IT")
> Category.create(name: "金融")/categoriesにアクセスします。
カテゴリの一覧が表示できていることが確認できます。

同じことをViewComponentを使って行います。
カテゴリコンポーネントファイルを生成します。
$ rails generate component Category categoryviewファイル側を以下のように変更します。
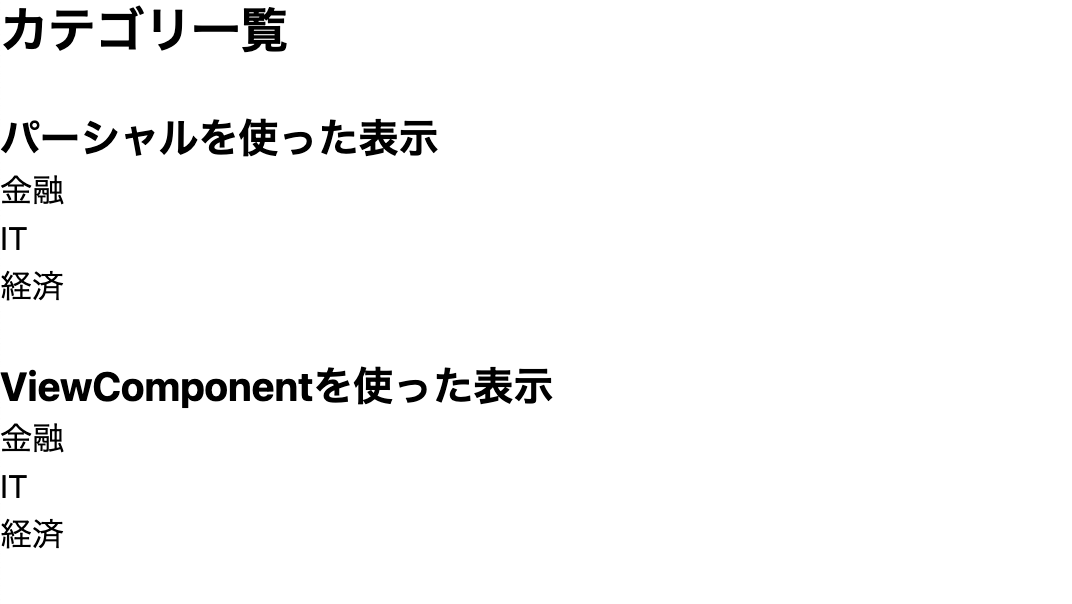
<%= @category.name %><br/>カテゴリ一覧ページでViewComponentを使用したパターンを追加します。
<%= render(HeadingComponent.new(size: "h1", text: "カテゴリ一覧")) %>
<br/>

<%= render(HeadingComponent.new(size: "h2", text: "パーシャルを使った表示")) %>
<%= render @categories %>
<br/>

<%# 追加 %>
<%= render(HeadingComponent.new(size: "h2", text: "ViewComponentを使った表示")) %>
<%= render(CategoryComponent.with_collection(@categories)) %>/categoriesにアクセスするとpartialを使った時と同じように表示ができていることが確認できます。
条件付きレンダリング
もし、ユーザーがログインしているときだけそのユーザーのアイコンを表示したいという場合、以下のようにviewファイル内にif文を追加することが多いかと思います。
<% if user_signed_in? %>
  <%= render(UserIconComponent.new(user: current_user)) %>
<% end %>ViewComponentではクラスファイルの方にrender?というメソッドを定義して表示条件を指定することができます。
# frozen_string_literal: true

class HeadingComponent < ViewComponent::Base
  include Devise::Controllers::Helpers

  def initialize(user:)
    @user = user
  end

  def render?
    @user.present?
  end
end
この定義により、viewファイル側でif文を記述する必要がなくなります。
<%= render(UserIconComponent.new(user: current_user)) %>テスト
ViewComponentではコンポーネント単位でテストを実行できます。
今回はRSpecを使って試してみます。
gemfileにrspec-rails, capybaraを追加します。
# 省略
group :test do
  gem "capybara"
end

group :development, :test do
  # 省略
  gem "rspec-rails"
end
# 省略
インストールしてrspec関連のファイルを生成します。
$ bundle install
$ rails generate rspec:installViewComponentのテストができるように設定を追加します。
require "view_component/test_helpers"

# 省略

RSpec.configure do |config|
 # 省略
  config.include ViewComponent::TestHelpers, type: :component
end
specディレクトリにcomponentsフォルダを作成して、以下の内容でカテゴリコンポーネントのテスト用ファイルを作成します。
require "rails_helper"

RSpec.describe CategoryComponent, type: :component do
  let(:category) { Category.new(name: "Test Category") }

  it "カテゴリ名が表示される" do
    render_inline(CategoryComponent.new(category: category))

    expect(page).to have_content("Test Category")
  end
end
bundle exec rspecを実行してテストが通れば完了です。
$ bundle exec rspec
.
Finished in 0.09086 seconds (files took 1.23 seconds to load)
1 example, 0 failuresこのようにrender_inlineメソッドを使ってコンポーネント単位でテストを行うことができます。
View Component Contrib
ViewComponentはデフォルトではapp/componentsフォルダ配下に2つのファイルが追加されていきます。
このままではcomponents内がファイルだらけになって管理がしづらそうな印象です。
そこでview_component-contribというgemを使うと、生成するフォルダの場所を指定できたり、generatorのカスタマイズなどが可能になります。
インストール
※view_componentは未インストール, RSpecをインストール済みの状態で進めます。
READMEのコマンドを実行します。
rails app:template LOCATION="https://railsbytes.com/script/zJosO5"どこにコンポーネントファイルを保管したいか聞かれるのでapp/views/componentsとします。
Where do you want to store your view components? (default: app/frontend/components) app/views/components Would you like to use dry-initializer in your component classes? (y/n) ystimulusを使うか聞かれるのでyとしておきます。
今回は触れませんが、設定については以下のディスカッションを参考にというメッセージが出ます。
https://github.com/palkan/view_component-contrib/discussions/14
Do you use Stimulus? (y/n) yTaliwindCSSを使うか聞かれるのでyとします。
Do you use TailwindCSS? (y/n) yカスタムgeneratorを使うか聞かれるのでyとします。
Would you like to create a custom generator for your setup? (y/n) yテンプレートはERBを使うので1とします。
Which template processor do you use? (1) ERB, (2) Haml, (3) Slim, (0) Other 1実行が完了したら設定ファイルが生成されます。
lib/generators配下にはgeneratorのテンプレートファイルが作成されています。
今回はRSpecをインストールしていたので、テストのテンプレートとしては
- component_spec.rb.tt
- component_system_spec.rb.tt
の2つが作成されていました。
app/views配下には指定した通りにcomponentsディレクトリが作成され、基底クラスである、
- application_view_component.rb
- application_view_component_preview.rb
が作成されています。
その他にもconfig/application.rbやspec/rails_helper.rbなどでも設定が追加されています。
見出しコンポーネントを作成
先ほどと同じように見出しコンポーネントを作成してみます。
generatorコマンドを実行します。今回はcomponentの箇所がview_componentとなっているので注意が必要です。
$ rails generate view_component Heading size textテンプレートの箇所で定義されているファイルがそれぞれ生成されます。
コンポーネントのクラスファイルでは先ほど選択したdry-initializerを使っていることでinitializeメソッドの箇所が簡潔に書けるようになっています。
# frozen_string_literal: true

class Heading::Component < ApplicationViewComponent
  with_collection_parameter :heading
  option :size
  option :text
end
コンポーネントを修正して表示してみます。
# frozen_string_literal: true

class Heading::Component < ApplicationViewComponent
  option :size
  option :text

  def font_size
    case @size
    when "h1"
      "text-2xl"
    when "h2"
      "text-xl"
    when "h3"
      "text-lg"
    else
      "text-md"
    end
  end
end
※with_collection_parameter :headingの箇所は必要ないので削除しています。
<%= content_tag(@size.to_sym, @text, class: class_names("font-bold", font_size)) %><%= render(Heading::Component.new(text: "見出し1", size: "h1")) %>
<%= render(Heading::Component.new(text: "見出し2", size: "h2")) %>
<%= render(Heading::Component.new(text: "見出し3", size: "h3")) %>
<%= render(Heading::Component.new(text: "見出し4", size: "h4")) %>ルートページにアクセスすると先ほどと同じように表示できていることが確認できます。

view_component-contribを適切に使うことでViewComponentがより扱いやすくなりそうです。
他にもStyle Variantsという機能を使ってTailwindCSSなどを活用したカスタマイズ性の高いコンポーネントも作成できそうなので参考にしてみてください。
参考
.png&w=256&q=75)
.png&w=256&q=75)

Shota Nagato
Webエンジニア
RailsとかNext.jsとか